3. Getting Started
Once you’ve installed Syncany, you can either use the Syncany graphical user interface (GUI), or the command line client (CLI). While the GUI is probably easier to use, the CLI offers more functionality and flexibility.
Contents
3.1. Using the graphical user interface (GUI)
After installing Syncany, open it from your apps menu and if all goes well, you’ll see a tray icon with the Syncany symbol in your notification area.
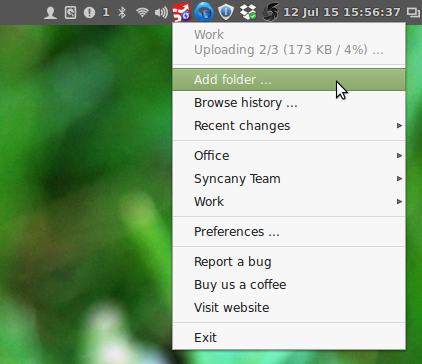
From this tray menu, you can select a new local folder to sync, change settings or install plugins. Every interaction with Syncany starts from this tray icon and its menu. Typically, if you’re new to Syncany, the following steps will have to be taken:
- Select and install a storage plugin via the ‘Preferences/Plugins’ dialog
- Initialize a new repository or connect to an existing repository via the ‘Add folder ...’ wizard
3.1.1. Installing a storage plugin
Syncany typically only ships with a single plugin. If you’d like to use other backend storages such as (S)FTP, Amazon S3, WebDAV and such, you’ll have to install the corresponding plugin(s). To do that, open the ‘Preferences ...’ dialog from the tray menu and install the plugin on the plugins panel:
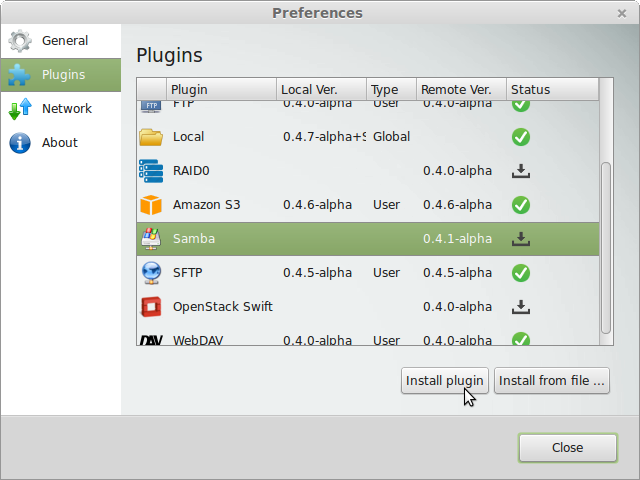
To use the plugin, a restart of Syncany is necessary.
3.1.2. Initializing a new repository
Unlike Dropbox and others, Syncany does not (and can’t) set up a default sync folder. To synchronize a set of files, you need to manually add a folder to Syncany and link it to a storage backend. To do that, click on the ‘Add a folder’ menu item in the tray. This will bring up a wizard dialog to guide you trough the process:
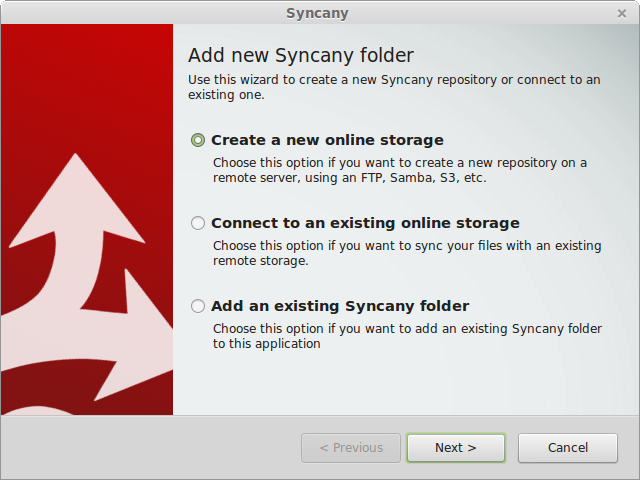
Among others, you will need to ...
- ... select a local folder that contains your files
- ... select a storage backend (e.g. WebDAV, Amazon S3, SFTP, ...)
- ... choose a password
Once you’ve gone through all of these steps, you can start adding your files to the local sync folder and connect other devices to your repository. Syncany will run as a daemon in the background and watch for changed/added/deleted files.
To see a screencast of the whole process, check out this YouTube video. Also check out our other Videos.
3.2. Using the command line interface (CLI)
The command line interface is much more powerful than the Syncany GUI. To use it, you can go ahead and open a terminal window and try out the sy command – everything you can do with Syncany so far is implemented in this command. The typical order of commands is:
- Install a storage plugin using
sy plugin install <plugin-id> - Initialize a new repository with
sy init - Then sync files manually with
sy upandsy down, or automatically with the daemon - Connect and share with other clients with
sy connect
3.2.1. Installing a storage plugin
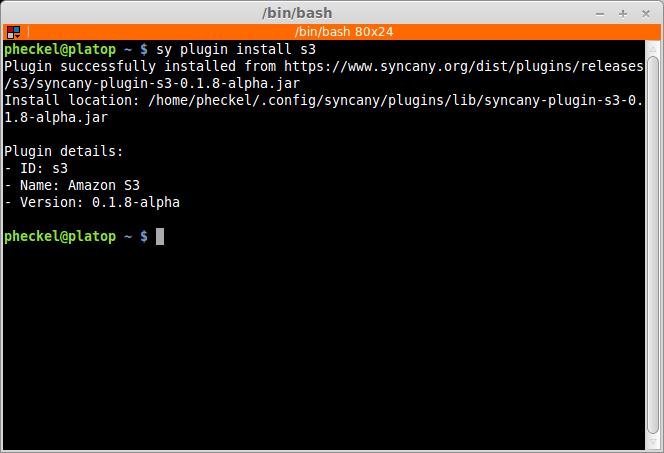
First choose the storage backend you’d like to use by doing sy plugin list and then sy plugin install. As of today, we’ve implemented a number of plugins. To get a complete list, check out the plugins page. For this example, we’ll install the Amazon S3 plugin:
3.2.2. Initializing a new repository
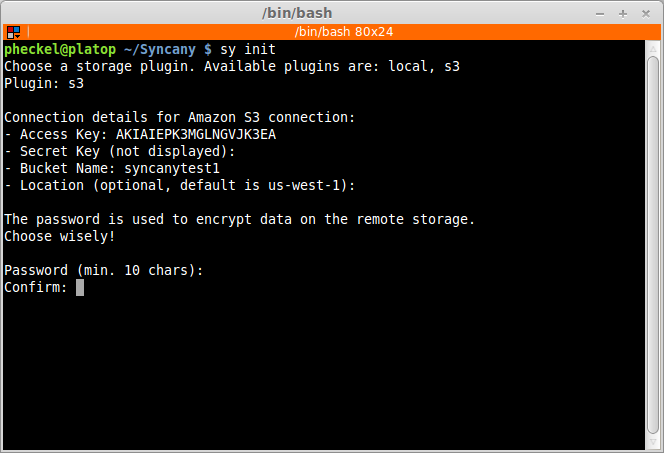
Once the plugin is installed (in this example the Amazon S3 plugin), you can set up a new repository: To do that, simply navigate to the folder you want to synchronize and type sy init command.
An interactive command line interface will ask you a couple of questions about how to connect to the offsite storage (hostname, credentials, etc.), and it will ask you for a password to encrypt your data with.
As soon as you’ve successfully run the init command, the repository is all set up. You can now sync files to it using sy up and sy down, and you can connect other client with the sy connect command. The command will output a link that you can share with trusted friends or colleagues that enables them to connect to the same repository.
Note
Syncany will synchronize everything in the initialized folder (including sub-folders). If you are just starting out, choose a small directory and and get a feel for the tool before synchronizing large amounts of data. Do not sync your home directory!
3.2.3. Syncing files
Syncany repositories can be synchronized manually via the command line, or automatically with the help of the background process (or daemon):
- Syncing files manually is useful for automated backup jobs, or if you want to use Syncany like a version control system.
- Using the automatic syncing turns Syncany into a Dropbox-like tool, because changes on local files are detected automatically and remote changes are synced right after they happen.
3.2.4. Manually syncing files
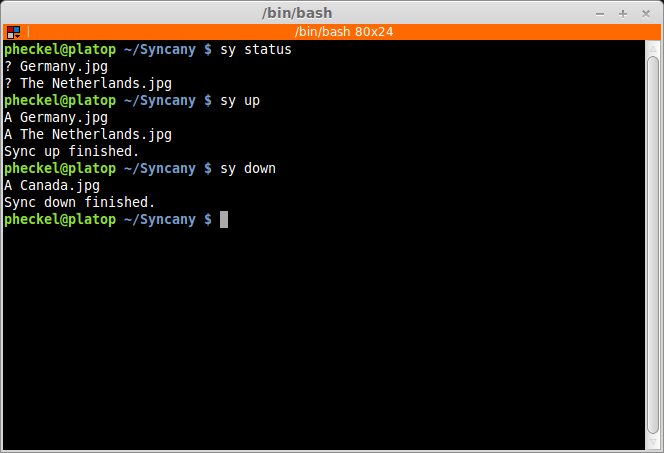
To use Syncany for manual syncing, the sy status, sy up and sy down commands are your best friends. These commands work similar to a version control system:
- The
sy statuscommand shows you if you’ve made local changes - The
sy upcommand indexes and uploads these changes - And the
sy downcommand downloads and applies remote changes locally
Unlike a version control system, however, there is no need to first add, then commit and then push changes – the sy up command combines these actions into one. Similarly, the sy down command fetches and applies changes in a single command.
There are a couple of other very useful commands to manage a repository and a local Syncany folder: Use sy ls to show the current and past file tree, sy restore to restore old or deleted files, and sy cleanup to save space on the offsite storage by removing old file versions. A full list of commands can be found in Commands.
3.2.5. Automatically syncing files
Note
As of today, the automatic synchronizaton setup is not as easy as it should be. We are aware of that and are working on a solution.
To set up a Dropbox-like folder synchronizaton for a Syncany folder, the folder has to be managed by the Syncany background process (also called the daemon). This background process can be started with sy daemon start. Once the daemon is started, all registered folders are monitored for changes and remote changes are automatically applied to the local folder. All of these actions happen in the background – without the need for any intervention.
By default, calling sy init or sy connect will not add the added local folder to the Syncany daemon configuration. That means, that unless you call the command with the --add-daemon option, the folder will not be daemon-managed. If you want to use the daemon, use sy connect --add-daemon or sy init --add-daemon.
To register a folder manually or remove a folder from daemon management, the daemon can be configured using the daemon config file at %AppData%\Syncany\daemon.xml or ~/.config/syncany/daemon.xml. Assuming that you’d like /home/pim/Syncany to be monitored and automatically synchronized, simply add the folder to the daemon.xml config file like this:
<daemon xmlns="http://syncany.org/daemon/1">
   ...
   <folders>
      <folder>
         <path>/home/pim/Syncany</path>
         <enabled>true</enabled>
      </folder>
   </folders>
</daemon>
To let the daemon know about the new folder, run sy daemon restart (or sy daemon reload, only on Linux).
3.2.6. Connecting other clients
A Syncany repository can be shared among many clients. There are two methods for new clients to connect to an existing repository:
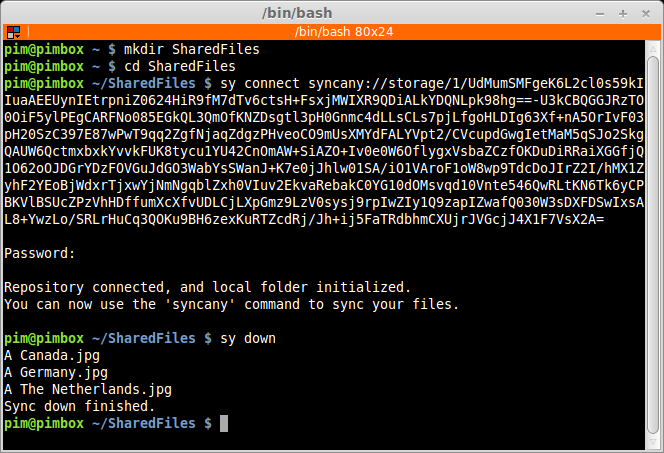
- Use
sy connectto manually enter the backend storage credentials (just like withsy init) - Use
sy connect <syncany-link>to avoid having to type the credentials by using asyncany://link
Both methods work equally well, but the syncany://-link method is more convenient. A syncany:// link contains the exact same information that was initially queried by the interactive sy init command – namely the plugin-specific settings such as hostname, user/password, and so on. Clients that already have access to the repository can create such a link by calling sy genlink form within the Syncany folder.
Once a new client is connected to a repository, all of the above mentioned commands can be used to either manually or automatically sync the repository.
While the syncany://-link itself is encrypted and may be shared via unsecure channels, sharing the link and the repository password gives users read/write access to your repository and typically enables them to access the entire backend storage.
Warning
Remember: Do not share the syncany:// link and the password with users that you do not fully trust. Users in possession of the link and the password might be able to delete/change files on the backend storage!
If, for instance, the repository is based on an FTP folder, the syncany:// link contains the FTP username and password. Users with access to the Syncany repository can also access the FTP storage with a regular FTP client and delete/change files as they wish.